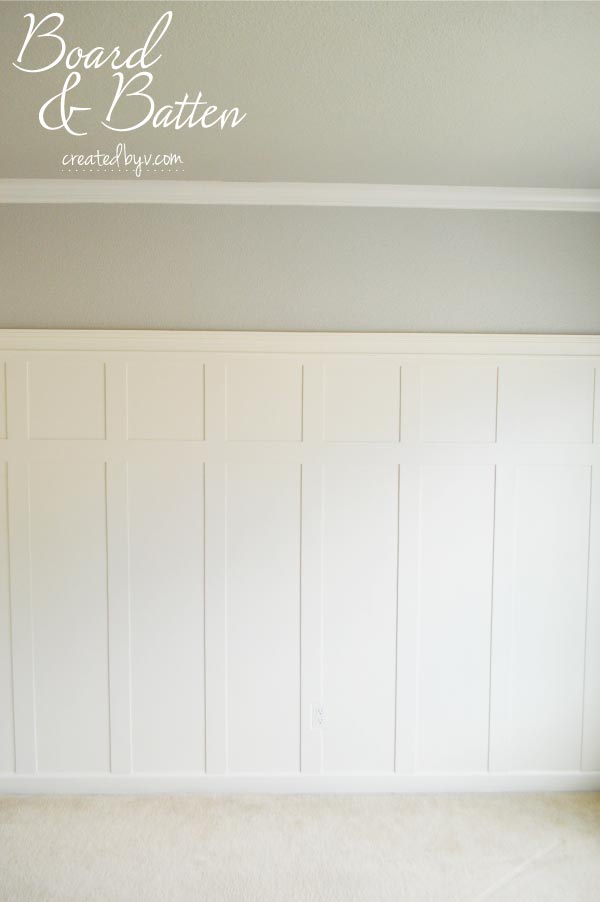
For my sweet little girl’s nursery, I wanted to incorporate wainscoting to break up the wall space monotony and give the room some classical character. With my mother-in-law’s help this past summer, we installed a beautiful board and batten wall for less than $100 and over a weekend.
The result was beyond my expectation. It truly is stunning.
There are many professionals who have posted the finer details of how to install board and batten, but the idea of blogging is to share my perspective with you. These instructions are what worked for us, leaning mostly on our previous experience applying beadboard to the half bath. Board and batten was way easier. So if you’re looking for a simple and affordable way to upgrade the look and feel of your home, board and batten is a terrific bang for your buck.
To start, here is a list of the supplies we used:
- (4) 1/4-inch 4′ x 8′ hardwood plywood boards
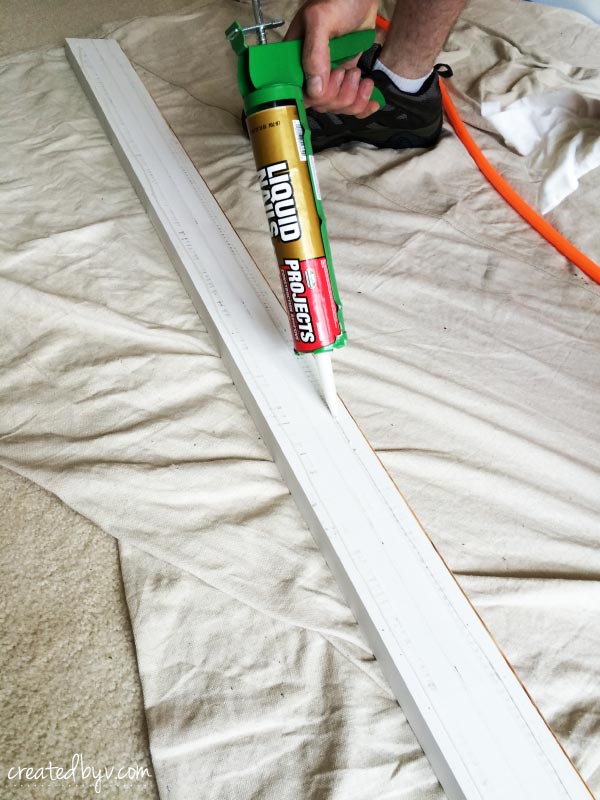
- panel adhesive {Liquid Nails}
- pneumatic nail gun
- paintable white caulk and gun
- wood filler
- finishing sander and sandpaper
- level and tape measure
- primer, paint and painting supplies
BOARD
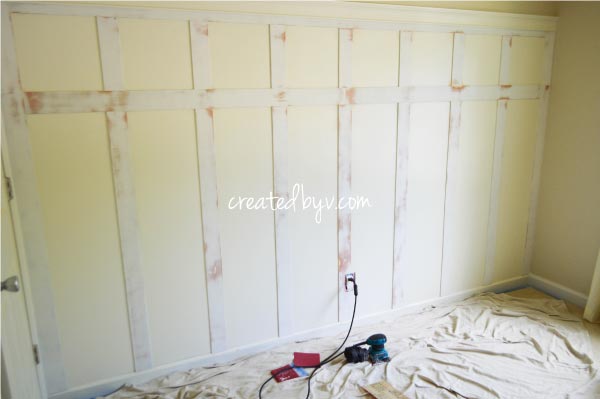
Because the walls in my daughter’s room have significant texturing, we covered it with 1/4″ hardwood plywood that was primed and ready to use in order to create a perfectly flat surface. If you have smooth walls already, you can skip this step and prep for battens by cleaning and painting.
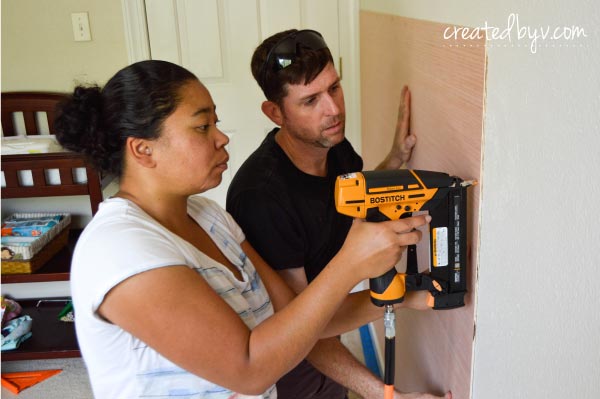
To attach each plywood panel to the wall, we applied generous amounts of Liquid Nails to the back and set it into the corner and on top of the baseboard. (We chose to use the existing baseboard, which saved both time and money.) The panels were further secured with finishing nails driven in with a nail gun connected to an air compressor. It was my first time using a nail gun, and man, did I fall in love with it. Wa-pow! Quick, light, done. I bet you’ll have some fun with it, too.
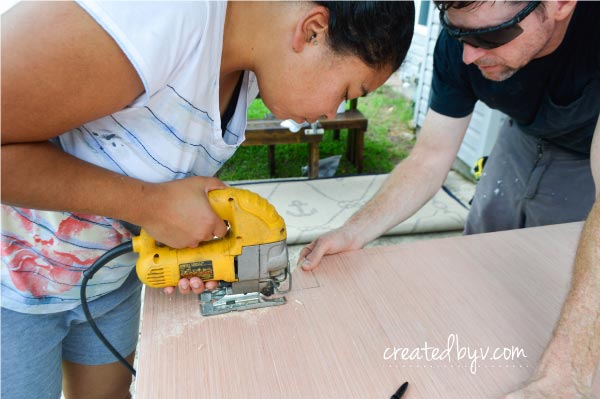
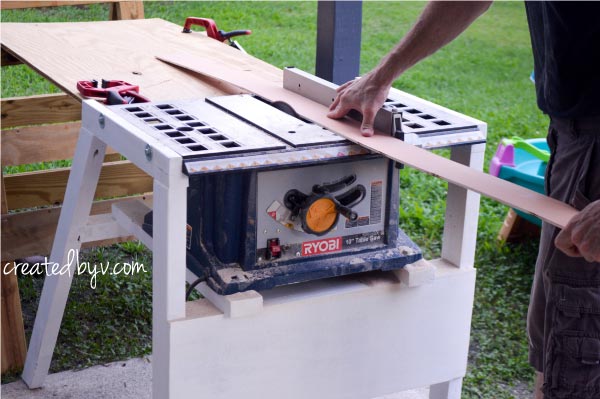
Based on our desired number/width of panels, we cut the plywood with a table saw to meet in the center of the wall where the joint would be covered by a batten. We also cut an opening with a jigsaw to accommodate the electrical outlet. Since the jigsaw doesn’t turn at right angles, the Chief taught me how to cut sharp corners by cutting from corner to corner at a diagonal. You’ll cut out two triangular pieces this way, and then ease the jigsaw into the corners to clean up the rectangle. Isn’t that smart?!
By the way, don’t shy away from this project because of the amount of sawing and cutting we did; Lowe’s or Home Depot will gladly cut pieces to exact measurements for you.
I guess I should mention that I’m usually the visionary behind our projects. I dream up the idea / image / concept and the Chief helps me with the particulars. For example in this project, I pointed to a spot on the wall for my desired height — “here-ish” — and we worked out a plan to make it happen exactly the way I wanted. He’s pretty great like that.
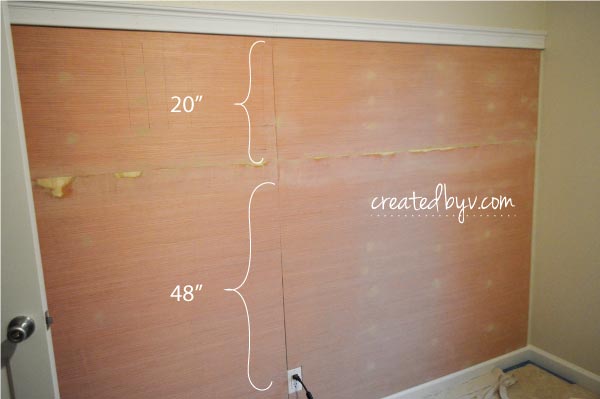
Because I wanted a taller-than-traditional wainscoting, we covered the wall with two 48″- and two 20″-high plywood boards.
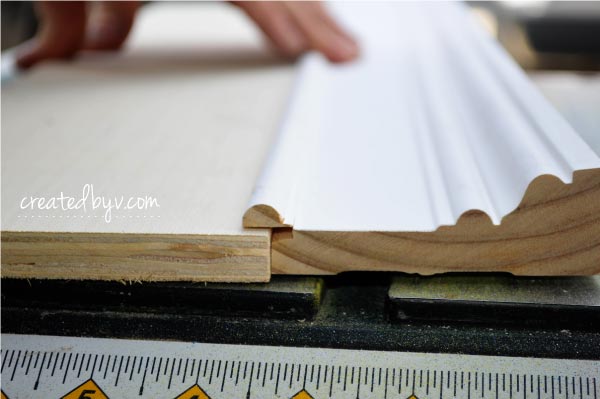
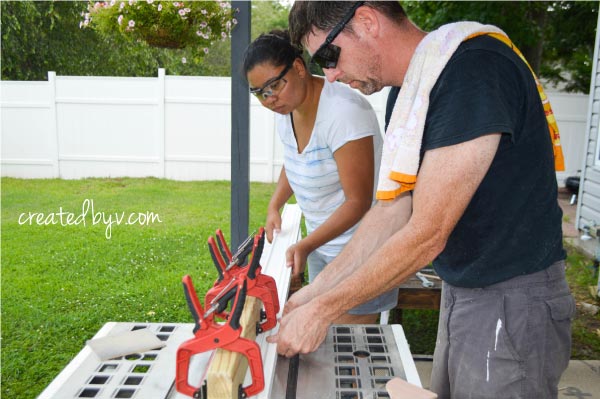
We capped the paneling with chair rail molding that we cut a 1/4″ x 1/4 ” rabbet joint along the bottom so it would overlap and cover the top of the plywood. We attached it in the same fashion as the panels: adhesive and nails.
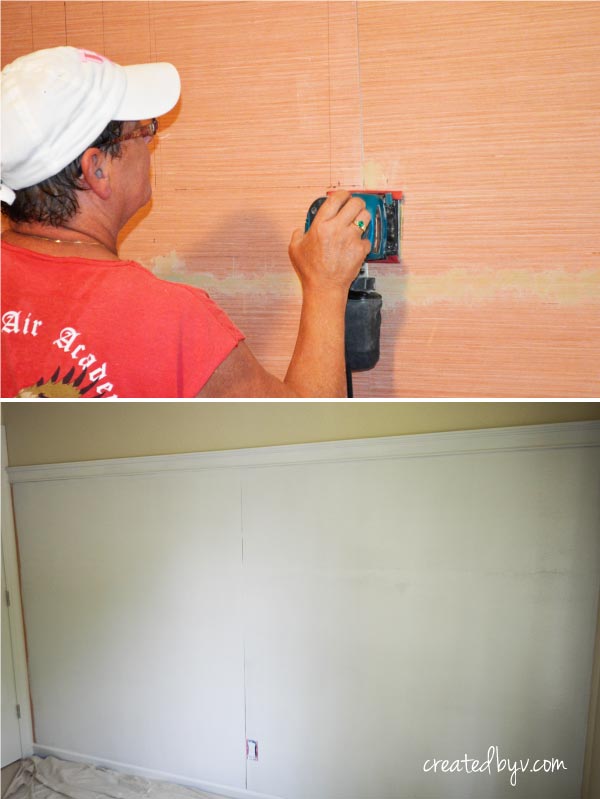
Once the board was up, we began the tedious task of filling nail holes and seams with wood filler and caulk and then carefully sanding all of those areas to an even finish. We applied a layer of KILZ latex primer and followed it with a coat of Sherwin-Williams paint in Creamy White. Painting the board ahead of applying battens ensured a seamless and full coverage.
BATTEN
You’ll need to calculate the number and width of panels and battens that will evenly divide your space.
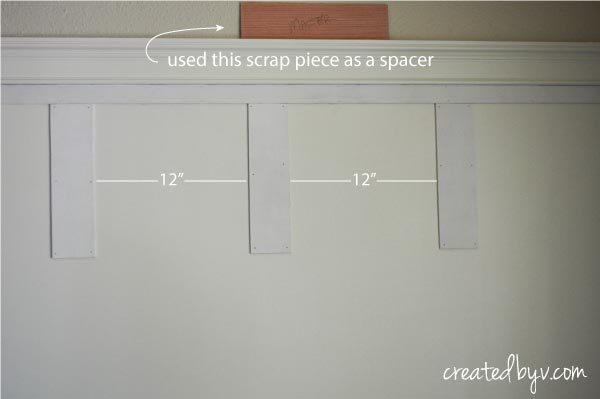
For our project, we divided the wall into 8 panels and set them 12 inches apart. We ripped the remaining pieces of plywood with a table saw into the following pieces:
- (9) 3 1/4″ x 12″ vertical battens {top boxes}
- (9) 3 1/4″ x 59 1/2″ vertical battens {bottom boxes}
- (2) 60″ x 1/2″ horizontal battens {top, optional}
- (2) 60″ x 3 1/2″ horizontal battens {center}
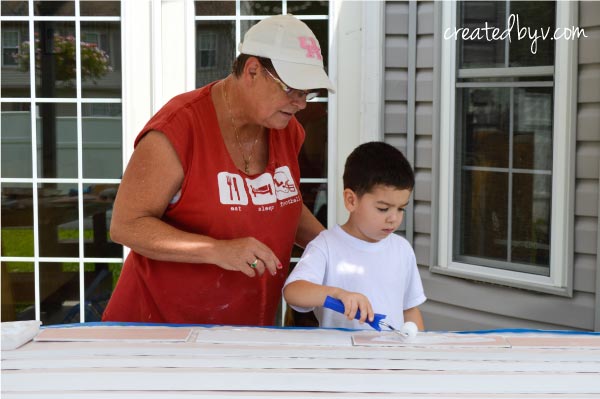
Before attaching them to the wall, we gave the battens a coat of primer. This prep step made the final painting a lot easier.
We didn’t use any adhesive with the battens — just the nail gun. We started by nailing a horizontal batten under the chair rail molding. (Feel free to bring your battens right up to the top ledge, if you’d rather.) We then attached the vertical battens along the adjoining walls. From there, we used a scrap piece of wood (12″ wide) as a spacer to assist in placing the next batten without having to take out the tape measure each time. We employed a level to ensure every batten was plumb and square.
After all the top battens were attached, we placed the center horizontal batten and continued on with the lower battens.
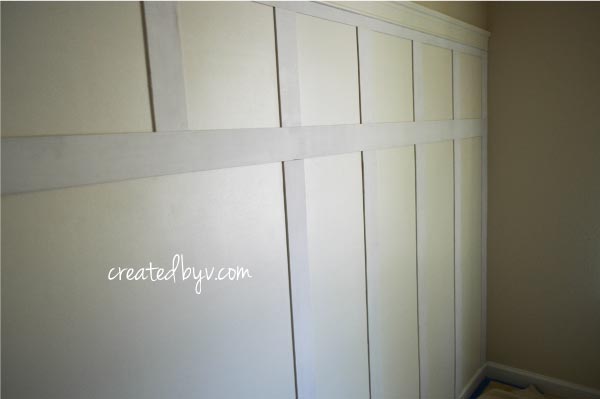
Once all the battens were attached to the board, it was time to fill nail holes and sand until smooth.
A final coat or two of paint and voila!
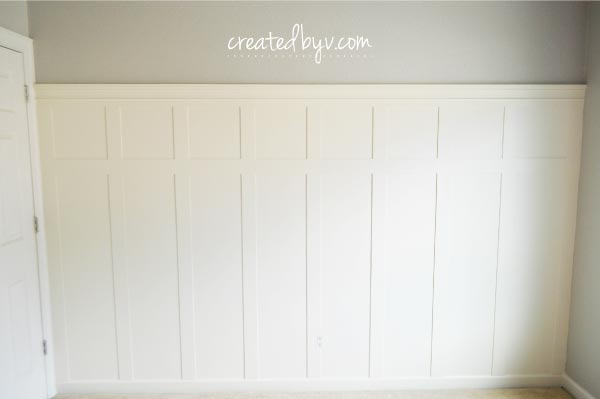
The board and batten covers about three-quarters of the wall at a finished height of 74.5″ tall from baseboard to chair rail. There is a lovely space above that will be perfect for hanging black and white portraits of my daughter when she was a newborn. See the full reveal here!

IN RETROSPECT
So what would I have done differently? I wanted perfect squares along the top so we placed the center horizontal batten higher than where the two sheets of plywood met behind it. Even though we carefully filled and sanded the joint, this area required touch-up a few months after installation. Next time, I’d cut the plywood into taller panels (60″ vs. 48″ high) so the center batten effectively covers the joint. Instead of wood filler, I’d like to try using joint compound, spackling or caulk along the other seams as well.
Even with this small flaw, I absolutely adore this wall. It’s simple and elegant. I’m certain you’ll see more of this in other parts of our home, too! Stay tuned! — v.

I love your wall. An easy way to cut out corners with a jig saw is to first drill holes in the corner — the size would depend on how large your piece is. Then you can start your straight lines at the corners where the holes have been drilled. It’s easy to straighten out the corners from the round drilled holes at the end. Just a thought — that way you don’t ‘have to cut diagonal cuts clear across the entire board twice — which should save a little bit of time and effort. I also wouldn’t use spackle on wood l– it will contract differently and would end up having to be redone occasionally. I know using wood filler is a pain, but in the long run, you will be happier with the results. Great job!
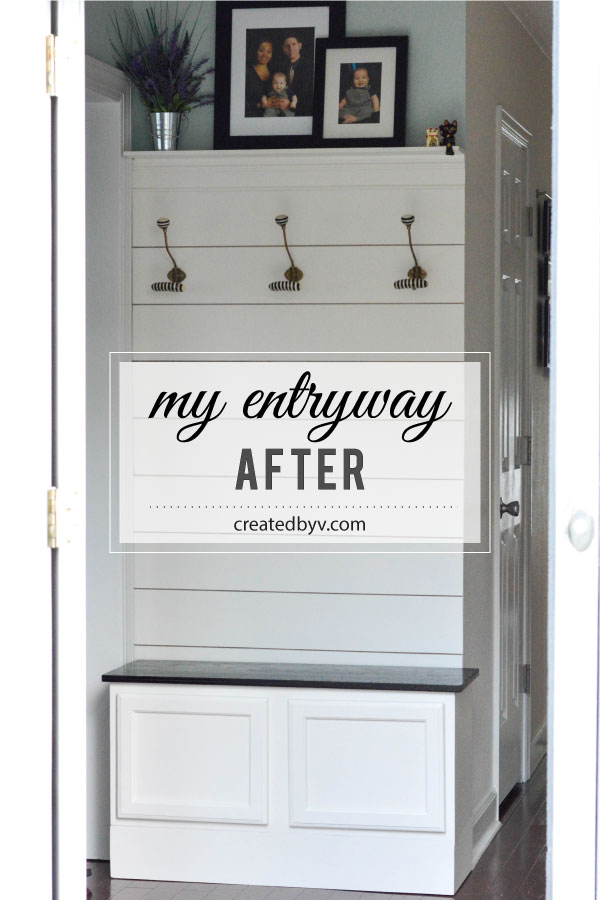
Yes, you are so right! I used the drill hole technique you described when I cut out an outlet from our shiplap walls in the entryway. And I’ve since tried spackle, caulk and joint compound — wood filler is definitely the best, but joint compound worked really well to fill in the screw holes in my daughter’s bookcase. Thanks for sharing your knowledge and tips with other readers and me, Jayne!
I think I understand these instructions. I went through each step mentally and answered my questions by referring back to your text and the photos. The one thing I didn’t get was the rabbets cut into the chair rail to make it stand proud–it seemed to me that either the chair rail molding was already peeking beyond, or that –I don’t know, I’m confused, just can’t grasp the concept. That aside, this tutorial is the clearest one I’ve read amongst all the others I’ve encountered in home blogs, step-by-step, good illustrative photos, and plainly but thoroughly written. Hope you and sweet little girl have many years of enjoyment of this room! Thanks for the lesson.
Thanks so much for your kind comment, Louise! To explain a bit more about the rabbet cut, we made it to ensure the board and batten would be level along the top and to get a clean, level line on the front. The rabbeted cut portion sits on top of the plywood while the remainder of the chair rail goes down and covers the front of the plywood. You can move the chair rail up and down to level even if your plywood is a little off. We did the same thing with our shiplap walls in the entryway (see pic). It’s an extra step, but I think the end result is worth the effort. Good luck on your project, and feel free to shoot me a note if you have any questions along the way!