Eek! It’s October! I have been looking forward to this month. It’s the month I was blessed with my first child — my sweet shark-loving son. It’s the month of pumpkins, ghosts and goblins… oh my! It’s the month of my second favorite holiday (next to Christmas, that is), All Hallows’ Eve.
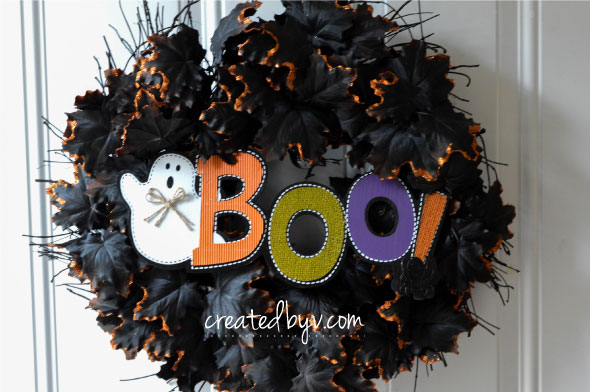
I am pretty excited about decorating our home for the holiday and getting the kids into the Halloween spirit, which leads me to today’s post. We inherited a hook on the front door when we bought our house in May. Now I’m finally making good use of it with this fun Halloween wreath.

It was my first time making a wreath; how did I do? I paid about $15 for supplies, while an already made one cost about the same on sale. Which do you prefer?
I will say there is a greater sense of satisfaction in making something yourself. Want to give it a try? Here’s what you’ll need to make one of your very own:
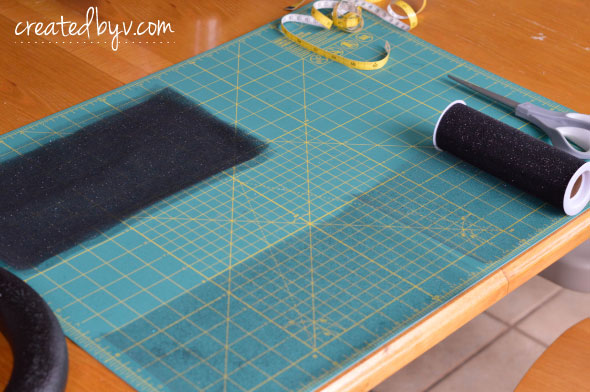
- 3 spools of 6″ x 10 yards black glitter tulle
- 12″ styrofoam ring
- Halloween decorations
- glue gun
- black spray paint, optional
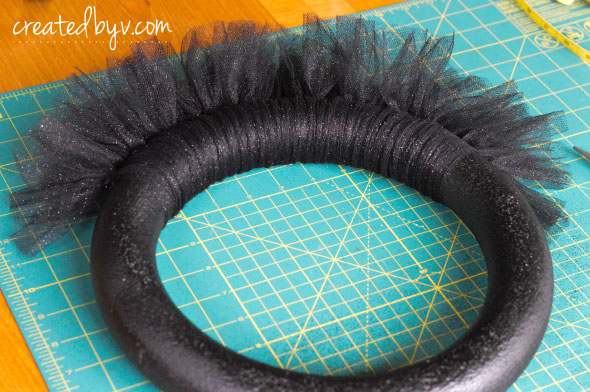
Step 1 (optional): Spray paint styrofoam ring black.
I used a green ring and painted it black just in case the tulle didn’t cover fully. I ended up having plenty of coverage, but my thinking is that it’s better to get it right in the beginning rather than regret you didn’t do it in the end!
Step 2: Cut 12″ strips of tulle.
I tried a few different lengths until I was happy with the size. I also opted to tie (vs. slip knot) my tulle on, which allowed for more strips. One roll of 6″ x 10 yard tulle provided about 30 pieces. Find a length that’s pleasing to your eye and cut all the strips the same length. This will help to lessen trimming later and create an even wreath.
Step 3: Tie the tulle strips onto the styrofoam ring.
I used a basic overhand knot, nothing fancy. I knotted the pieces twice and pulled them tight. Once you have all your strips tied to the ring, you can slide them along to arrange nicely.
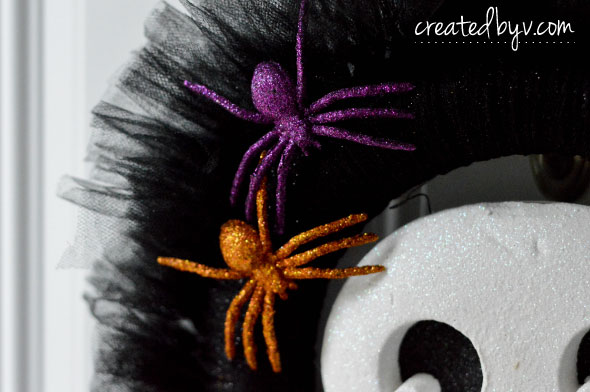
Step 4: Attach decorations with a hot-glue gun.
I didn’t want to frighten my littles, so I went with more “friendly” decorations that I bought at my local craft store (use those 50% off coupons!). You could also add ribbon roses or silk flowers for a more elegant look like this one.
Step 5: Hang and enjoy!
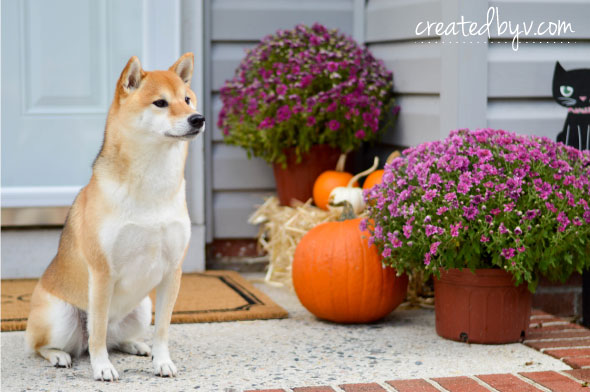
I used the wire attached to the skull decoration to hang my wreath, but a big, bright orange ribbon would be a great addition, too. Add some fall-colored mums, a few pumpkins and a straw bale for a festive porch to welcome trick-or-treaters.

Happy Halloween decorating to you, too! — v.


Love it!!!!! You did great! I love this concept!!!!
Thanks, Gena! That means a lot coming from you! Your wreaths are awesome!