Have you finished decorating for the holidays yet? I am a little behind {only 17 days left to enjoy the splendor!}, but am in full swing now! I absolutely LOVE this time of year — the baking, the gifting, the merriment — it is this DIYer’s creative dream.
But before I start today’s tutorial, I want to take a moment to THANK YOU for being a part of this little adventure called a blog. I feel so incredibly blessed that you choose to share in the fun with me, and I hope you’ve been inspired to express your own creativity along the way.
So in the spirit of the holidays and in appreciation for being such amazing readers, followers and friends, I am giving away a $50 Lowe’s gift card to one lucky winner! {The raffle is concluded; the winner is Carley Schneider!}
Now, back to our regularly scheduled program…
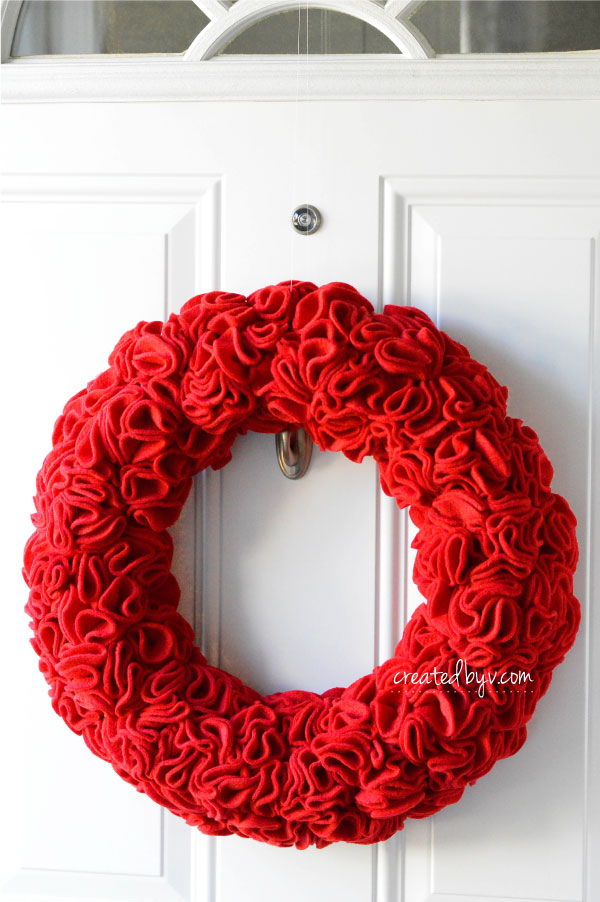
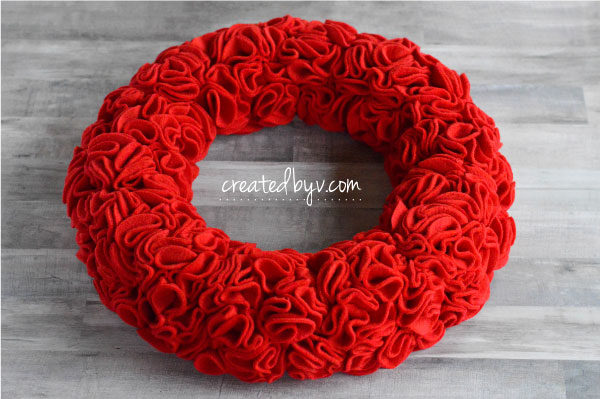
This stunner of a wreath. Red + Ruffles. Merry and bright, indeed!
Last year, I made a wild and wispy boxwood wreath that I loved so much I made a few for my kitchen windows this year.

For our front door this year, I wanted something that would stand out against the white door — like this red amaryllis wreath from Crate and Barrel.

Gorgeous, right? I was going to try to DIY it, but couldn’t find enough faux florals when I went on the hunt. Then, I stumbled upon this example, remembered I had a ton of red fabric leftover from another project and got to work.
Now, it’s your turn! Follow these simple steps to make one for your home or gift to a friend.
Red Ruffle Wreath
{a tutorial}
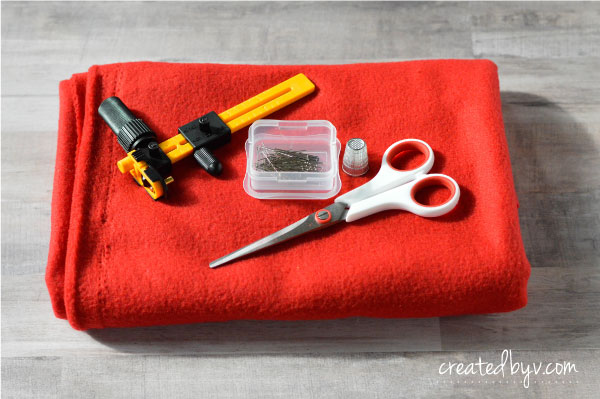
Supplies
- 1 1/2 – 2 yards red felt or fleece
- 16″ straw wreath
- 350 long pleating pins
- thimble / scissors
- rotary circle cutter
- self-healing cutting mat
{step 1} Using the rotary circle cutter, cut lots and lots and lots of circles. My circles are 3″ so I set my rotary circle cutter to 1.5″ radius.
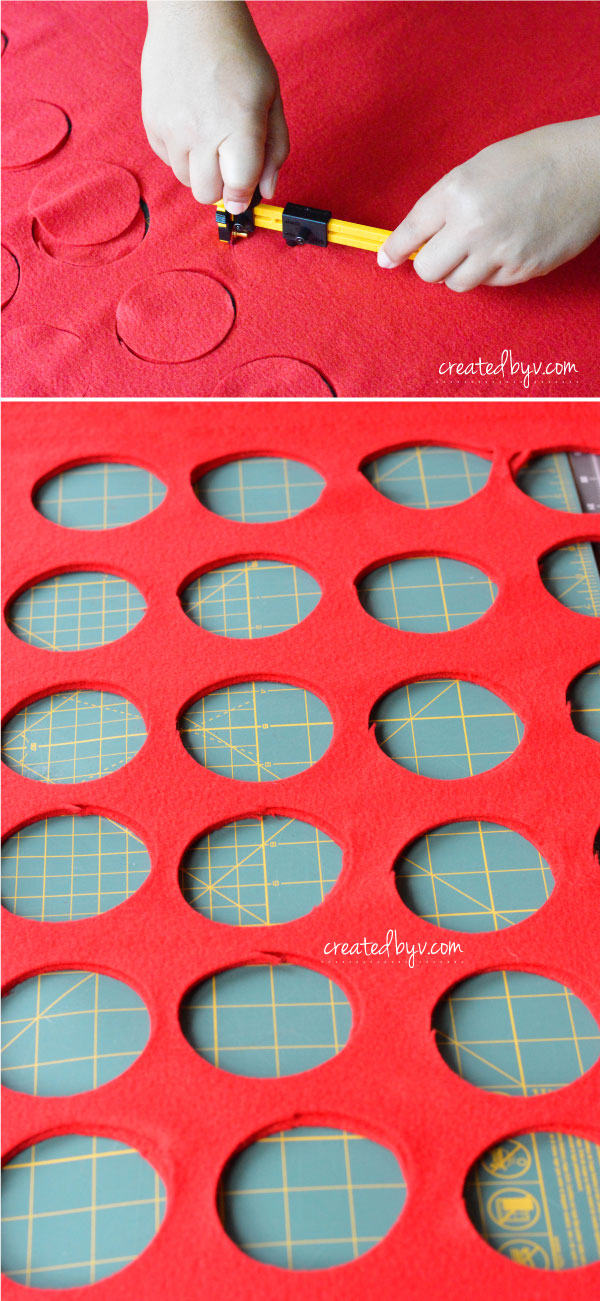
The example I followed used felt, which is probably less expensive and easier to work with, but I used red fleece that I already had on hand from a camera bag insert project. Fleece is softer than felt so it’ll move a bit when you’re trying to cut it. I doubled up the fabric, pulled it taut and clamped it down to make my cuts.
{step 2} Fold each circle in half twice. It’ll look like a pizza slice or a heart, depending on how you hold it. Then, stick a pin through the corner.
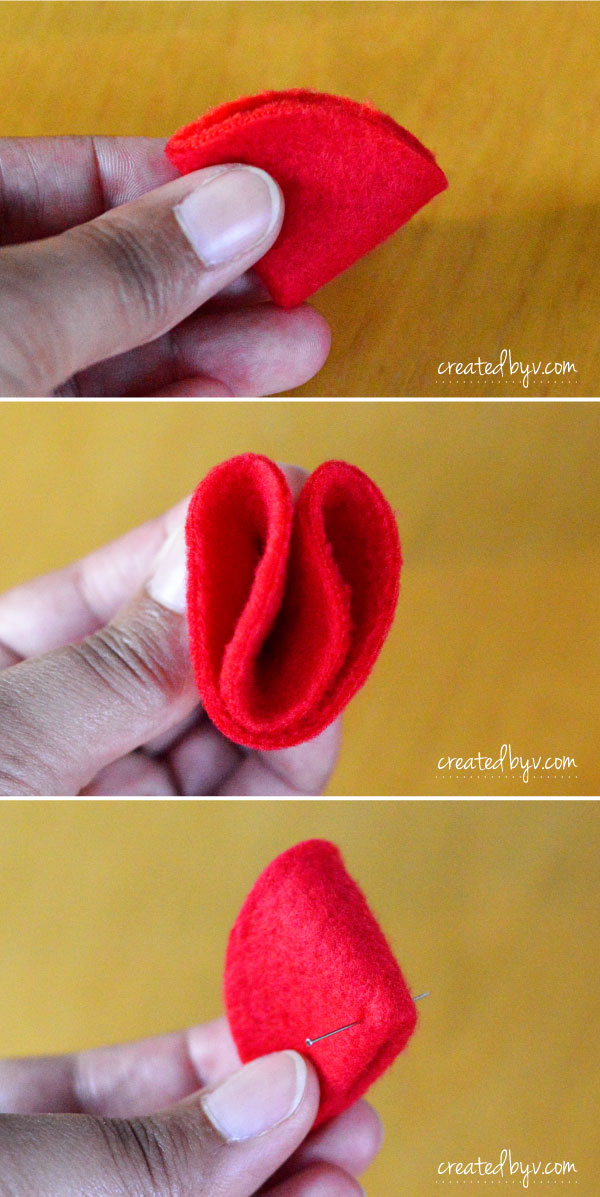
{step 3} Using a thimble to protect your finger, push the pin into the straw wreath. For consistency, I used this pattern for placing the circles. I pinned the four triangles (folded circles), opened the ruffles and then moved along to fill the wreath.
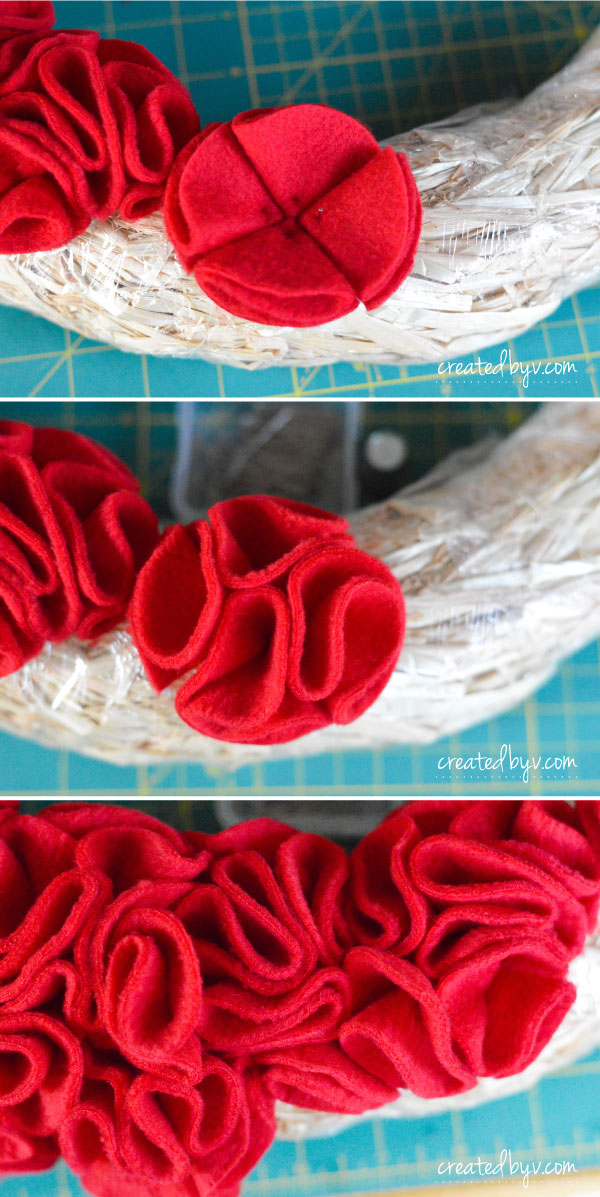
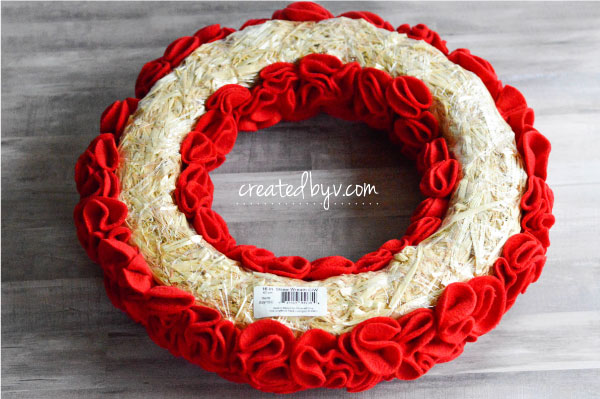
I did the face first, then the top, then the inside. Lastly, I filled in the empty spots. I didn’t bother with the back since it hangs against the door.
{step 4} Pin a piece of scrap ribbon to the back and hang.
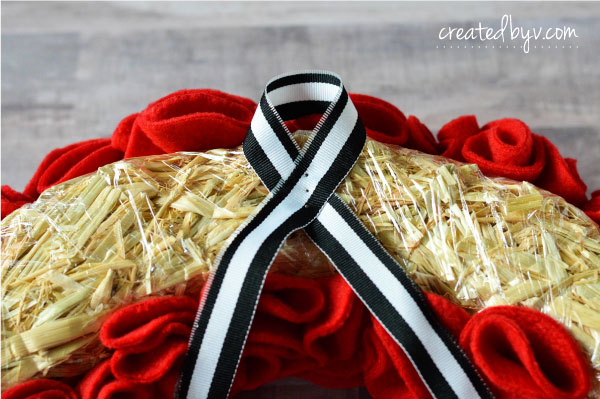
I found that my door hook is positioned too low for the ribbon method, however, so I used a piece of fishing line instead.
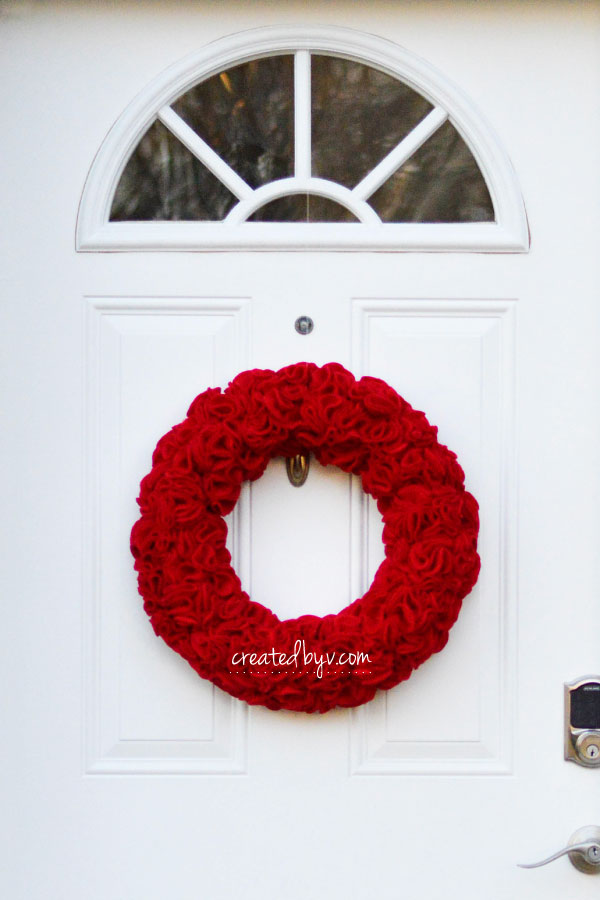
Isn’t it striking? I think it would be great for Valentine’s Day, too.


Ok, so now for the giveaway!
To enter to win, please join the fun and subscribe to receive blog updates. That’s it! If you’re already a subscriber, then you’re already entered to win. You can increase your odds of winning by:
(1) liking my Facebook page,
(2) following me on Pinterest,
(3) following me on Instagram, and
(4) following me on Hometalk.
That’s five chances to win!
[mc4wp_form id=”1265″]
Raffle closes on December 18 and the winner will be announced here on December 20. A winner that resides outside the range of a Lowe’s will be sent a $50 Visa Gift Card instead. Lowe’s is not sponsoring this giveaway; it is coming from our own pockets with our love and in hope you’ll go forth and DIY!
Congratulations to Carley Schneider!
Thanks again for reading! We wish you a very merry holiday season! — v. & family


I see this felt being folded, then ‘pinned’ with straight pins and the fluffed up. My question is how strong is the hold of just 1 pin per circle? My concern is after all that work….they pop off especially if someone bumps it.
The pins are surprisingly stable. I haven’t had a problem with circles falling off, even when handling it. I pulled it out of storage today and it looks good as new with just a little fluffing. I hope you’ll give it a try, Carla!
I love this project and your clear instructions. However I don’t see a size for the circles.
Thanks
Judy
Good point, Judy! My circles are 3″ — I’ll make that addition to the tutorial. Thanks!
A couple of years ago, I splurged on a red wreath made of wood shavings (from Lowe’s, no less) and I loved it… until one of my little snowflakes slammed the door too hard and down it went into pieces. And pieces. On first (and even second) glance, your wreath looks like its doppelgänger. I can’t wait to give this a try!
Oh no! That just broke my heart; I can imagine all those little wood curls all over the ground. :( So I am thrilled that this ruffle wreath may well give you a good substitute! And it definitely won’t break… it’s fluffy! Good luck!
You know I love this beautiful, simply elegant wreath!!! You explain the steps in a way that convinces me that I might be able to truly to this myself! You continue to inspire me with your ideas! Thank you!
I got so excited about this idea, I forgot to proof read my comment…”I might be able to truly DO this myself!” :)
Thank you, Sarah! You are always so uplifting and supportive of my efforts. I’m glad you like the wreath — and yes, you can do it, too!
My goodness, that is very generous of you! I did all five options… although I’m already subscribed to your feed on Bloglovin’ so the other subscription is probably overkill.
I like your red ruffle wreath… it looks great on your front door! And I very much like the boxwood… the looser arrangement of the leaf branches and the added red berries is lovely!
Awesome, Kathleen — that greatly improves your chances of winning! And I greatly appreciate our interactions! I made a neater version of the boxwood wreath this year, but I think I like the wild and wispy look better, too! Thanks again, Kathleen!